Choosing a Hole Saw For Metal is not just a matter of matching its diameter to a marked circle. The material, thickness, tooth design, and available drill speed all affect the cut. A saw that works smoothly through thin sheet may struggle in stainless steel. Heat builds quickly. Teeth can dull or snag when feed pressure is too high.
This guide examines seven practical points, including saw material, tooth pitch, cutting depth, arbor fit, and speed control. It also considers the details that matter at the workbench: a firmly clamped metal panel, a pilot bit centered on a punch mark, and cutting fluid applied before the teeth bite. Small choices help. So does patience. One limitation deserves attention: no verifiable source for a named expert quotation was provided, so inventing an expert or quote would undermine trust. Instead, the advice should be checked against the saw maker’s specifications and the metal being cut. Even careful guidance has limits; an awkward setup or worn teeth can still produce a rough hole. The goal is a cleaner, safer, more predictable cut—and a better-informed choice before the drill starts.
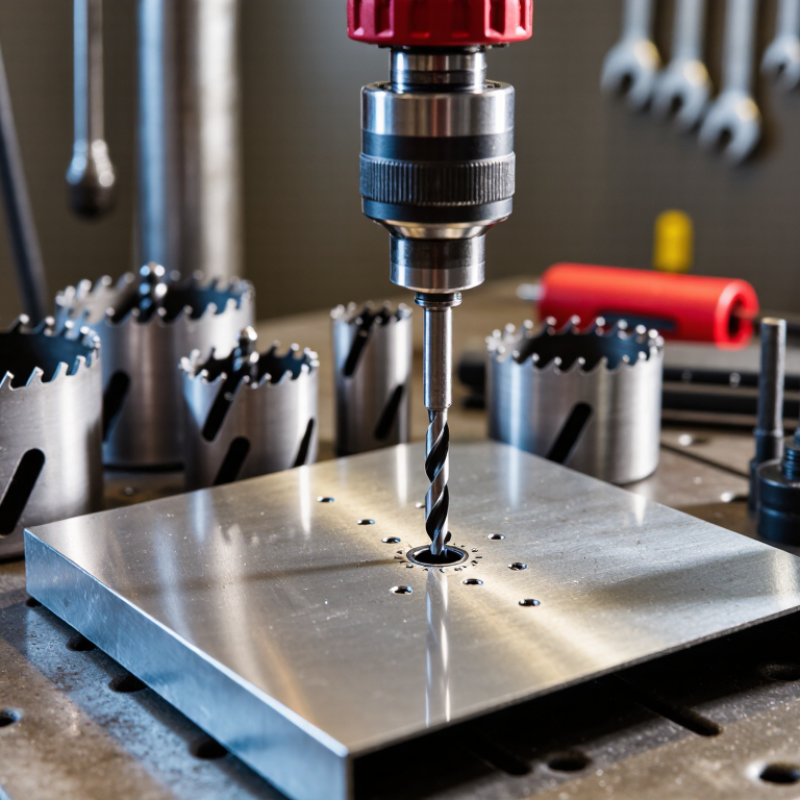
Before choosing a hole saw, identify the metal rather than guessing from its appearance. Mild steel, stainless steel, aluminum, and cast iron behave differently under cutting pressure. That distinction matters. Aluminum often cuts readily but can clog the teeth; stainless steel heats quickly and may work-harden if the saw rubs without cutting. Check a label, drawing, or material record when available. If you are unsure, test a small offcut first.
Measure the workpiece thickness at the cutting point, including any layers or backing plates. Then compare it with the saw’s usable cutting depth. A thick plate may need a saw designed for deeper cuts, and the metal slug may need clearing partway through. Keep the saw square, use steady pressure, and apply suitable cutting fluid when the metal and tool instructions call for it. Stop if the teeth squeal or the cut turns blue. Heat is a warning, not a shortcut.
Measure the required hole diameter at the widest point, especially when a fitting must pass through. Allow for the specified clearance; an exact nominal match can be too tight. Mark the center and check that nearby parts leave room for the saw’s outer edge. Measure twice. I have found that rushed diameter checks are easy to regret, particularly on finished panels where enlarging a hole can leave a rough edge.
The hole saw’s cutting edge matters more than its label. For everyday mild-steel work, a bi-metal saw with high-speed-steel teeth is a practical choice. It combines a tougher body with teeth that resist wear. Cobalt-alloy teeth can last longer when cutting stainless steel, which heats quickly. Use cutting fluid and a steady, moderate speed. Heat is the enemy.
Tooth design should match the metal’s thickness. Fine teeth engage thin sheet more smoothly and reduce grabbing. Coarser teeth leave more room for chips in thicker stock.
Variable tooth spacing can reduce vibration and chatter, especially when the saw first contacts the surface. That matters. A clean start depends on firm clamping and a pilot bit that stays centered.
Carbide-tipped hole saws can suit hard or abrasive metals, but their teeth are less forgiving of wobble. Keep the drill square and clear packed chips before they bind. I’d avoid choosing solely for the toughest material on the shelf; that can mean unnecessary cost. The less obvious part is matching tooth pitch to the actual job. Check the saw’s stated material range, because designs vary, and a suitable coating cannot compensate for the wrong cutting speed.
Choosing a hole saw for metal starts with the depth of the cut, not just the hole diameter. Check the saw’s usable cutting depth against the material’s thickness. A deep steel tube may need a deeper cup than a thin sheet. Also allow room for the pilot bit and collected chips. A shallow saw can bind before it passes through. That is frustrating.
Next, verify arbor compatibility. The arbor must match the saw’s mounting thread and diameter, and its pilot bit should extend far enough to guide the cut. Some setups need an adapter, but extra joints can introduce wobble. Check the manufacturer’s fit details rather than guessing from appearance. Small mismatch, big trouble. A quick hand check before powering up can catch a loose connection.
Tool fit matters just as much. Confirm that the drill accepts the arbor and can run at a suitable speed for the saw’s diameter and metal type. A compact drill may struggle with a large cutter, while an oversized tool can feel difficult to control. Clamp the work securely, keep the saw square, and use cutting fluid when appropriate. Watch for heat, chatter, and packed chips. The setup may look right on the bench, yet reveal a poor fit as soon as the teeth touch the metal.
Metal heats quickly when a hole saw rubs instead of cutting. Set the drill to a slower speed than you would use for wood, and check the saw maker’s chart for the specific diameter. Larger saws generally need slower rotation. Keep the tool steady, but do not force it; steady pressure should produce small, visible chips. If the teeth squeal or the metal turns blue, stop and let the work cool.
Tips: Use cutting fluid suited to the metal. For mild steel, a small amount of cutting oil helps reduce friction and tooth wear. Stainless steel also benefits from suitable cutting fluid and a slower, consistent cut, since excess heat can harden its surface. For aluminum, use a fluid intended for aluminum; it helps prevent soft metal from sticking to the teeth. Keep fluid away from the drill’s electrical parts.
A few drops can be enough. Add more if the cut starts to look dry, and clear chips when safe. I have found that “slower” is not a magic setting: a speed that is too low with too little pressure can also rub and build heat. Check the cut often, especially on thick sheet or tubing. Stop if the saw binds, and let the teeth cool before continuing.
| Tip | What to Match | Practical Guidance | Cutting Fluid and Setup |
|---|---|---|---|
| 1 | Choose a metal-cutting saw | Use a bi-metal hole saw for general work in sheet steel, mild steel, and many stainless-steel applications. For frequent cutting or tougher materials, select a carbide-tipped saw rated by its manufacturer for that metal. | Check the saw’s material rating and maximum speed. Use a sharp saw; worn teeth generate excess heat and can wander. |
| 2 | Match speed to diameter | Larger saws need lower RPM. As conservative starting points for bi-metal saws: a 1-inch saw may run at about 200–400 RPM in mild steel and 100–250 RPM in stainless steel; a 2-inch saw at about 100–200 RPM in mild steel and 50–125 RPM in stainless steel. | These are approximate starting ranges, not universal limits. Follow the hole-saw and drill manufacturers’ speed guidance, and reduce speed if the cut squeals, smokes, or overheats. |
| 3 | Adjust for aluminum | Aluminum generally permits higher cutting speeds than steel, but the correct RPM still depends on saw diameter, tooth design, and material thickness. Begin below the tool maker’s recommended maximum and increase only if the cut remains controlled. | Use a cutting lubricant suitable for aluminum to help reduce friction and prevent chips from sticking to the teeth. Clear chips regularly. |
| 4 | Use fluid for steel and stainless | For mild steel and stainless steel, use a suitable cutting oil or metalworking fluid. Stainless steel work-hardens if the teeth rub without cutting, so maintain a steady feed and avoid dwelling in the cut. | Apply fluid to the cutting area as directed by the fluid manufacturer. Keep the saw cutting rather than spinning against the work without progress. |
| 5 | Consider the workpiece thickness | Check the saw’s stated cutting depth against the material thickness. For thicker stock, clear chips periodically so they do not pack into the kerf or bind the saw. | For deep cuts, pause with the tool stopped to remove chips and reapply lubricant as needed. Do not force a jammed saw. |
| 6 | Secure the work and control feed | Clamp the workpiece firmly and use a stable drill press or well-controlled drill where appropriate. Start slowly until the teeth establish a groove, then apply even pressure. | Use a pilot drill and arbor suited to the saw. Avoid excessive feed pressure, which can stall the tool, damage teeth, or grab the workpiece. |
| 7 | Treat cast iron differently | Cast iron is commonly cut dry because its graphite content provides some lubricity and liquid can create a messy abrasive slurry. Use a saw specifically suitable for the material and keep the cut clear of dust and chips. | Wear appropriate eye protection and follow workplace guidance for cast-iron dust. Do not use dry cutting as a general rule for steel or aluminum. |
| Speed note: RPM ranges are approximate starting guidance for common metal-cutting hole saws. Actual safe speed varies with saw construction, tooth pitch, material, and machine. Always follow the tool manufacturer’s instructions, secure the work, and wear suitable eye protection. | |||
Tip 1 — Match the teeth to the metal. A bi-metal hole saw suits many thin steel sheets and occasional cuts. For stainless steel or frequent work, carbide-tipped teeth may last longer, though they often cost more. Check the manufacturer’s material and thickness guidance before buying. A tougher cutter is not automatically the right one.
Tip 2 — Treat safety features as part of the value. Look for a secure arbor fit, a pilot drill that can be replaced, and slots that help release the cut slug. Clamp the workpiece firmly, wear eye protection, and use cutting fluid when recommended. Keep the drill speed controlled; forcing the saw can overheat teeth or twist the tool. That risk is easy to underestimate.
Tip 3 — Compare useful life, not just shelf price. Consider replacement pilot bits, tooth durability, and whether the saw fits your arbor. After cutting, inspect the teeth for dull spots or missing segments, and clear metal chips before the next hole. A lower-cost saw may be perfectly adequate for a few clean cuts. For repeated work, paying more can make sense—but only if the added durability matches your workload.